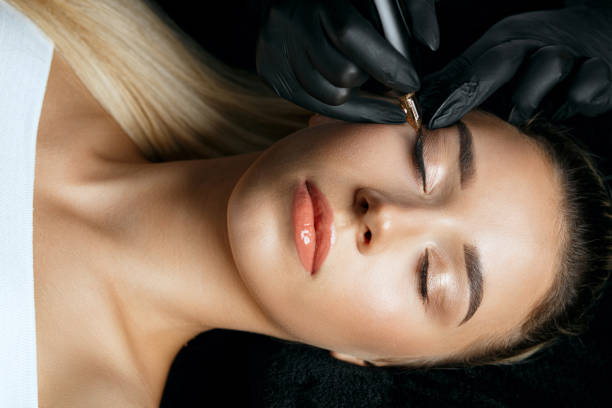
These little details will make your liner game stronger.
It takes patience and skill to create perfect winged eyes. It is worth learning how to apply winged eyeliner if you’re a beginner. Don’t worry! We’re here to help you! Perfect wings bring drama to your eyes. They enhance your facial features and add an extra touch of elegance and sexiness to your look. But you need more than shaky hands to get the look. You can achieve a polished look quickly if you have the right tricks. Look up to find out the details.
How to Make Winged Eyeliner
Method 1: How to Create Winged Eyeliner with Angled Eyeliner Pencil
This is the perfect one to solve your woes with winged eyeliner. It is that simple. For a neat finish, you can also dampen the brush.
Step By Step Tutorial
- Dip your angled brush into your eyeliner and place it at the outer edge of the eye. This will create an angle with the temples.
- To create the upper curve on your wings, place the same brush invertedly over the line you drew.
- Use your eyeliner brush to fill the space between the lines, then extend the liner to the inner corner.
They were related: Makeup tips to make small eyes look bigger with eyeliner. Fun Fact: The history of the winged eye may go back to Ancient Egypt when Cleopatra had dramatic winged eyes. Her kohl was made from lead sulfide, a naturally occurring mineral.
Method 2: Free Hand Guide
It takes practice and patience, but it is possible to create perfect, neat, winged eyeliner.
Step By Step Tutorial
- Use a pencil to draw a line along the outer edge of your eyes using a liner. Make an angle with your eyebrows. You can adjust the length to suit your preferred size.
- Place the pencil at the end of the line and draw a bar with a slight curve that flicks inward. Continue the line until you reach the inner corner. If it is difficult to draw the same line simultaneously, extend it halfway up your upper lash line. Then continue until you reach the inner corner. It is essential to thin the line gradually if you have smaller eyes.
- Fill in the space between the top and bottom lines of your wing.
- You can leave the eyeliner as is if you prefer a softened look. If you like your wings to stand out more, you can use liquid eyeliner to trace the lines you created using your pencil. If you plan to include this step, it is possible to allow your pencil eyeliner to have a rough edge. Liquid eyeliner will mask any rough edges to give the perfect smooth finish.
Quick Tip: Ensure your elbows are flat on a steady surface when applying eyeliner. This will allow you to have a lot of control over your hand movements.
If you don’t find this guide helpful, you may need additional guidance to master your killer wings. Fret not. You can find the solution in everyday items such as spoons, scotch taps, and brushes made explicitly for this purpose.
These hacks will show you how to create a dramatic winged eyeliner using the right products.
Related: A Simple Trick to Prevent Eyeliner Smudging – Tutorial with Detailed Steps
Method 3: How to Make Winged Eyeliner with Tape
In addition to fixing your torn paraphernalia regularly, your scotch tap or cellophane can also help you draw perfect winged eyes.
Step By Step Tutorial
- A tape about 2 cm in length should be cut and placed along your outer edges. This will give you the angle at which you want your wings.
- To draw the wings using the outline of the tape, trace along the angled edge using your eyeliner.
- End the process by drawing a line from your upper lash line to your lower lashes.
5 Steps to Make Eyeliner from Your Eye Shadow StyleCraze says: The sensitive area around your eyes can be susceptible. To reduce adhesive strength, rub the tape several times on your hands.
Method 4: How to Create Perfect Winged Eyeliner with Spoon
Grab a spoon and head to the kitchen to create the perfect winged eyeliner. You can use the straight edge of your spoon and the curve of your spoon to guide you for precise wings.
Step By Step Tutorial
- Place the handle of the spoon in the outer corner of your eyes.
- Follow the line of your handle with your eyeliner to draw a straight line.
- Place the spoon’s rounded end on your eyes and close your eyes.
- To create the curving tip of your wing, use the rounded edge.
- Line the area between the two lines with eyeliner, and then apply the liner to your upper lash line as you would normally.
Related: Five New Ways to Wear a White Eye Liner
Method 5: How to Create a Perfect Winged Eyeliner with a Business Card
The best way to draw winged eyeliners professionally is by using a business card you don’t have anymore.
Step By Step Tutorial
- Draw a line on a business card to correspond to the size of your eyes.
- Use a ruler to cut the pattern that you have drawn.
- You can use the cut-out as a stencil to make your wings.
Related: How to Use Gel Eyeliner
Method 6: Create Winged Eyeliner with a Swipe Card
Instead of spending money on expensive tools and stencils to create wing-like eyeliners, you can use your credit card or debit card to draw your winged eyelid.
Step By Step Tutorial
- The straight edge of the card should be held at the outer corner. Make a slight angle with your temples.
- To create wings, trace along the straight edge using eyeliner.
- Apply the eyeliner along the upper lash line to the inner corners.
P.S. A pen, pencil, or straight object can create a straight wing. In these cases, however, the branch will likely be more sharpened and less curvy.
Valuable Tips and Precautions for Winged Eyeliner Application
- Make sure you choose the right eyeliner type. There are three types of eyeliners: liquid, gel, and pencil. Although gel and liquid liners are more striking and bold, they can be messy for beginners. Pencils, on the other hand, give you a more subtle and soft finish and are recommended for beginners.
- Cat-eyes and wing eyeliner look great on everyone. They can be worn every day or for special occasions. You can adjust the sharpness and length of your wings to suit the drama level you want. You can also change the size and shape of the branches to match the condition of your eyes.
- It’s normal for beginners to make mistakes with eyeliners, even with all the help. If you make a mistake, don’t be discouraged. Use a cotton swab to remove any oily residues gently. For a quick fix, you can also use clear lipgloss.
- You can get better control of liquid eyeliners by placing them in the refrigerator for about 10-15 minutes. This will make it easier for you to control the applicator.
Infographic: Three Simple Steps to Master the Winged Eyeliner
It’s become a cult favorite because it unifies every look. Winged Goddesses are those who can do it without any assistance.
These simple and easy tricks can be used to join your family using items around the house. You can find out more by checking the infographic.
Illustration by StyleCraze Design Team
If you are looking for makeup basics, the winged eyeliner is a timeless look you can’t miss. This dramatic, versatile, and glamorous look has not changed. This skill is essential if you want to create a flawless makeup look. This article will show you six simple ways to create winged eyeliner. Although it may take some practice to get the perfect wing, you’ll soon be doing it like a pro, and it will all pay off!